> For the complete documentation index, see [llms.txt](https://docs.airops.com/llms.txt). Markdown versions of documentation pages are available by appending `.md` to page URLs; this page is available as [Markdown](https://docs.airops.com/docs/de/kontext/memory-stores/add-data/import-from-sql-database/data-sources/redshift.md).
# Redshift
Eine Redshift-Datenbank in AirOps verbinden
{% hint style="info" %}
**Denk daran, unsere IP-Adresse auf die Allowlist zu setzen `52.71.87.39`**
Wenn deine Datenbank durch eine Firewall geschützt ist, denke daran, eingehenden Zugriff für die IP-Adresse von AirOps über deinen Datenbank-Port zu erlauben.
{% endhint %}
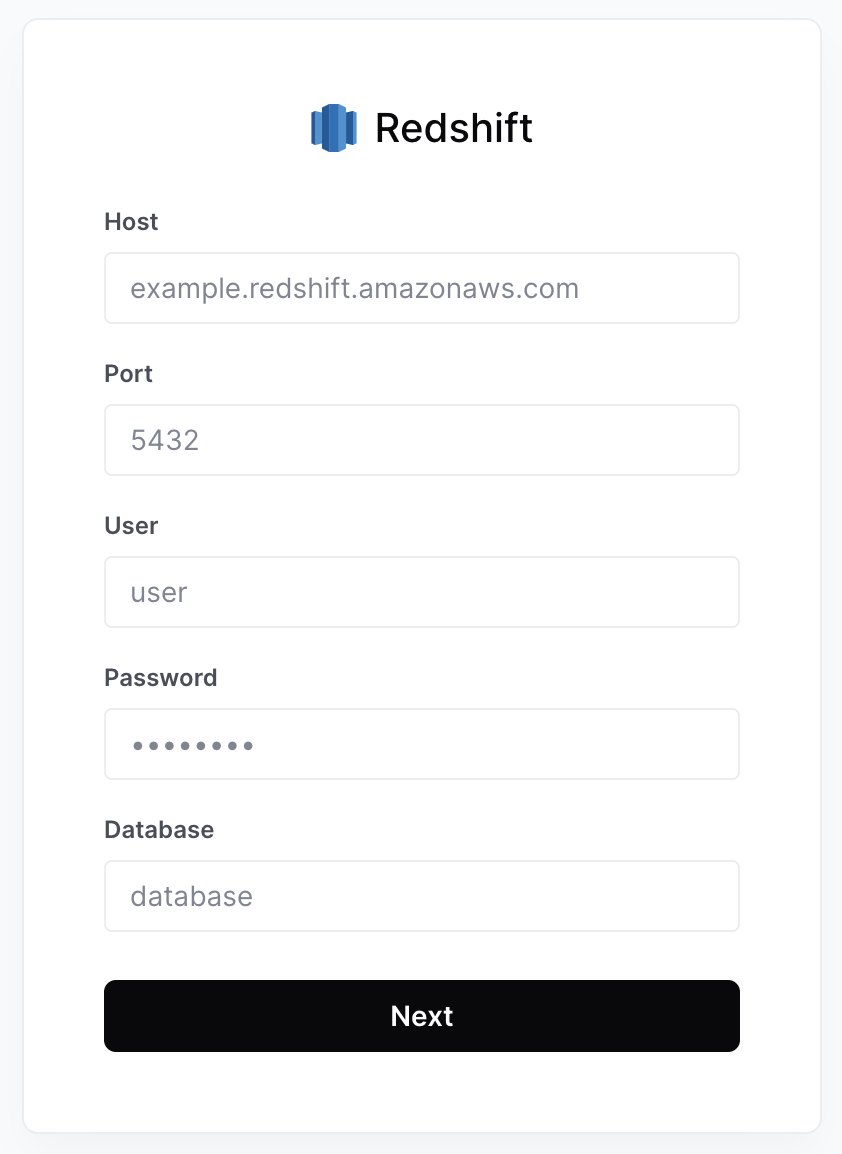
1. **Host oder IP** - Der Endpunkt Ihres AWS-Redshift-Clusters.\
Beispiel: `examplecluster.abcdefghijkl.us-west-2.redshift.amazonaws.com`
2. **Port** - Der Port, auf dem Ihr Redshift-Cluster lauscht. Standard ist `5439`.
3. **Benutzer** - Der Redshift-Benutzer, mit dem AirOps sich mit der Datenbank verbindet. Best Practice ist, einen neuen Benutzer für AirOps zu erstellen (Anweisungen unten), aber jeder Benutzer mit SELECT-Berechtigungen kann verwendet werden.
4. **Passwort** - Passwort für den obigen Benutzer.
5. **Datenbank** - Die Redshift-Datenbank, mit der AirOps sich verbindet.
## Benutzer einrichten und Zugriff gewähren (für neue Benutzer)
Um eine AWS-Redshift-Datenbank als Datenquelle in AirOps hinzuzufügen, verwenden Sie einen vorhandenen Benutzer oder erstellen Sie einen Benutzer mit **Lesezugriff** Zugriff auf die Tabellen und Schemas, auf die Sie von AirOps aus zugreifen möchten:
### 1. AirOps-Benutzer erstellen
```sql
CREATE USER airops_user
PASSWORD '';
```
### 2. USAGE- und SELECT-Berechtigungen für den AirOps-Benutzer gewähren
Ersetzen Sie `` und `
` durch die entsprechenden Schema- und Tabellennamen, mit denen AirOps interagieren soll.
```sql
GRANT USAGE ON SCHEMA "" TO airops_user;
GRANT SELECT ON TABLE ""."
" TO airops_user;
```
Wenn Sie Zugriff auf mehrere Tabellen gewähren möchten, können Sie den `GRANT SELECT` Befehl für jede Tabelle ausführen.
### 3. (Optional) Zugriff auf zukünftige Tabellen im Schema gewähren
Wenn Sie Zugriff auf alle zukünftigen Tabellen in einem Schema gewähren möchten, können Sie den folgenden Befehl verwenden. Ersetzen Sie ihn durch den entsprechenden Schemanamen.
```sql
ALTER DEFAULT PRIVILEGES IN SCHEMA ""
GRANT SELECT ON TABLES TO airops_user;
```
---
# Agent Instructions
This documentation is published with GitBook. GitBook is the documentation platform designed so that both humans and AI agents can read, navigate, and reason over technical content effectively. Learn more at gitbook.com.
## Querying This Documentation
If you need additional information that is not directly available in this page, you can query the documentation by asking a question.
Perform an HTTP GET request on the following URL with the `ask` and `goal` query parameters:
```
GET https://docs.airops.com/docs/de/kontext/memory-stores/add-data/import-from-sql-database/data-sources/redshift.md?ask=&goal=
```
`ask` is the immediate question: it should be specific, self-contained, and written in natural language.
`goal` is what the user is ultimately trying to achieve, the reason they need the answer. Sharing it helps GitBook give you a better, more relevant answer. A goal is most helpful when it describes the outcome the user wants rather than restating the question. For example, with `ask=how do I create an API token`, a goal like `automate deployments from our CI pipeline` lets GitBook tailor the answer to that use case.
The response will contain a direct answer to the question and relevant excerpts and sources from the documentation.
Use this mechanism when the answer is not explicitly present in the current page, you need clarification or additional context, or you want to retrieve related documentation sections.